Creating jobs for SLC 500 or MicroLogix
- Start the AdminClient and open the Jobs module.
- In the Project tree, select the RSLogix500 component.
- In the menu tab, click on Create or drag-and- drop the components into the Jobs section.
- Check in the section Job configuration, if the upload type RSLogix 500 is being displayed.
- Make sure the desired settings are in place for the following sections: General, Notification, Upload and compare, Create a version automatically after job run. The Notification and Create a version automatically after job run sections are only displayed if the necessary settings have been implemented.
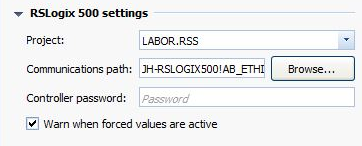
- Configure the settings in the RSLogix 500 settings section
- Under Project, the RSLogix 500 project’s RSS file should have been automatically selected. If this is not the case, select this file from the dropdown list.
- In Communications path, enter the gateway data. The way to do this is dependant on the software that you are using (RSLinx or FactoryTalk Linx):
- Open the FactoryTalk Linx Browser tool and right-click on the project. The project’s configuration opens.
- Copy the path of the device path. For example, RSLinx Enterprise!Ethernet\10.0.220.145. (The RSLinx Enterprise! part of the path is optional.)
- Enter the path into the Communications path field in the job configuration.
- In order to select the path to the PLC, click on Browse in Communications path.
- Communications path will open. Select the PLC of the job that you want to save.
- Click on Save and test the job by clicking on Execute selected jobs once.
- Enter the path to the PLC manually. The path can be found in RSLinx. The path has the following format: xxx!yyy.
- xxx is the name of the computer running RSLinx Classic.
- yyy is the name of the configuration for the PLC in RSLinx Classic.
- Do not forget the separator ! between both parts of the path.
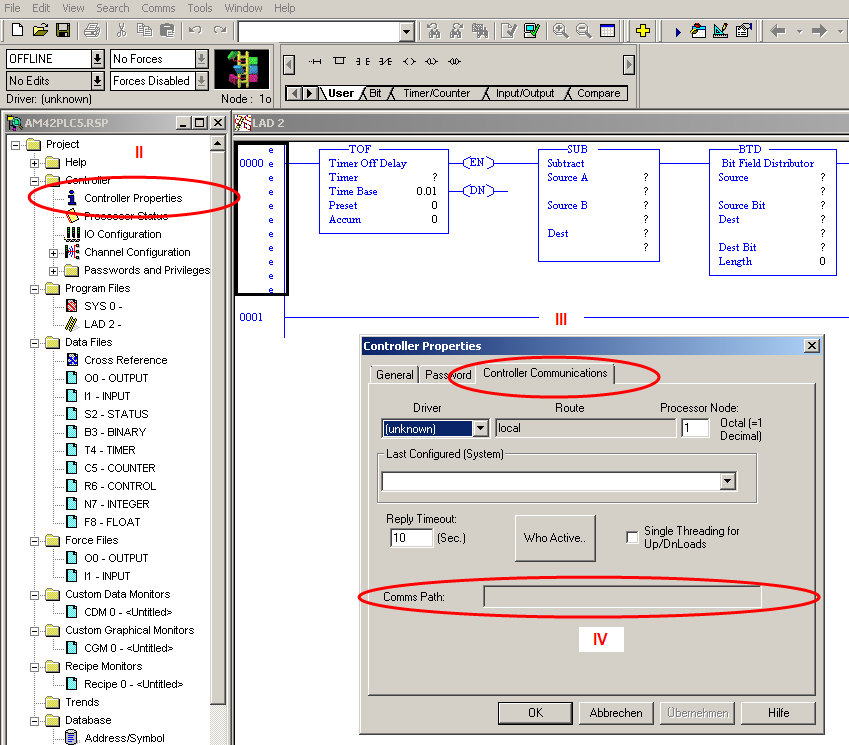
- Open RSLogix 500.
- Double click on Controller properties in the project tree.
- Open Controller communications.
- Copy the text Comms path.
- Enter the text into the section Access path. This is located in the job configuration in the AdminClient.
- If the project is password protected, enter the necessary password in the Controller Password section.
- By checking Warn when forced values are active, you can decide if you want to have a warning displayed when forced values are active in your project.
- Click on Save and test the job by clicking on Execute selected jobs once.
If you updated RSLogix Enterprise Edition with FactoryTalk Linx, enter the communications path manually:
Proceed as follows:
If you are using RSLinx Classic and are using it on the same machine as your versiondog server, proceed as follows:
If you are using RSLinx Classic and are not using it on the same machine as your versiondog server, proceed as follows:
Or
 To be able to process password protected projects, the editor needs to be opened in English.
A displayed warning can be useful, for example, when using manual control at your facilities and there is the chance that the forced values could be overseen.
The job result (backup) can be used for a detailed comparison, a disaster recovery and further processing.
You can make further settings for jobs of this upload type in the AdminClient in the dialog Global Job settings
|
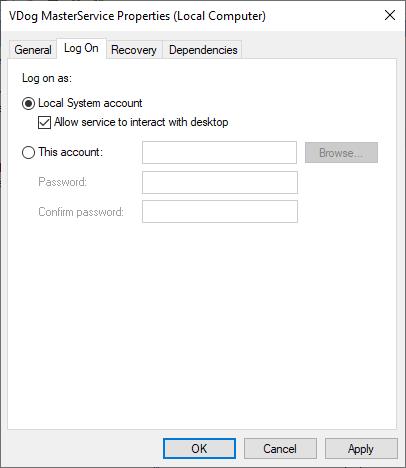
Why does the upload freeze when I upload a password protected RSLogix 500 project?
versiondog remotely steers the editor when uploading a project and enters the password when required. It may be necessary to run versiondog under the system account and with the option Allow data exchange between service and desktop(user interactivity) activated. Proceed as follows:
|

| Related topics: |
|---|
| About versiondog -> Term Jobs |
| AdminClient -> Job configuration |
| AdminClient -> Adding additional job settings |